Tutorial 1: Handling Touch Events
In this tutorial, we'll see how to properly use the touch event mechanism to provide some interaction with our app.
For that, we're going to implement a simple game where red and blue rectangles appear randomly on the screen. The user can touch only the red rectangles. A counter is incremented when a red rectangle is touched.
Android Project
Create a new Android project or open an existing one.
Let's begin by creating an empty activity as described in the Basics.
The name of our activity will be TouchInteractionActivity and the corresponding layout file has the name
activity_touch_interaction. After that, add the DrawView component to the layout file (see Adding the DrawView Component).
The layout looks like this now:
1 2 3 4 5 6 7 8 9 10 11 12 13 14 15 16 17 18 19 20 21 22 23 24 25 26 27 | <?xml version="1.0" encoding="utf-8"?> <android.support.constraint.ConstraintLayout xmlns:android="http://schemas.android.com/apk/res/android" xmlns:app="http://schemas.android.com/apk/res-auto" xmlns:tools="http://schemas.android.com/tools" android:layout_width="match_parent" android:layout_height="match_parent" tools:context="net.offbeatpioneer.demoapp.retrographicsengine.tutorials.TouchInteractionActivity"> <net.offbeatpioneer.retroengine.view.DrawView android:id="@+id/graphics" android:layout_width="match_parent" android:layout_height="match_parent" android:screenOrientation="landscape" android:theme="@android:style/Theme.NoTitleBar.Fullscreen" /> <TextView android:id="@+id/text_counter" android:layout_width="wrap_content" android:layout_height="wrap_content" android:layout_marginEnd="8dp" android:layout_marginRight="8dp" android:layout_marginTop="8dp" android:text="0" app:layout_constraintEnd_toEndOf="parent" app:layout_constraintTop_toTopOf="parent" /> </android.support.constraint.ConstraintLayout> |
A TextView is also added in advance which will function as a counter later.
Add the following code to the activity after it is created:
1 2 3 4 5 6 7 8 9 10 11 12 13 14 15 16 17 18 19 20 21 22 23 24 25 26 27 28 29 30 | public class TouchInteractionActivity extends AppCompatActivity { public static RenderThread renderThread; private DrawView drawView; @Override protected void onCreate(Bundle savedInstanceState) { super.onCreate(savedInstanceState); setContentView(R.layout.activity_touch_interaction); drawView = findViewById(R.id.graphics); renderThread = new RenderThread(drawView); } @Override protected void onResume() { super.onResume(); if (renderThread != null) { RetroEngine.shouldWait = false; } } @Override protected void onPause() { super.onPause(); if (renderThread != null) { RetroEngine.isRunning = true; } } } |
Create the State
Now, we're going to create a state class and name it RectangleGameState. Use the built in feature of
Android Studio or create a new file RectangleGameState.java and insert:
1 2 3 4 5 6 7 8 9 10 11 12 | public class RectangleGameState extends State { private TextView counterView; private long counter = 0; @Override public void init() { counterView = manager.getParentActivity().findViewById(R.id.text_counter); } // ... code omitted } |
In the init() method we find our counter view in the layout and save
the instance for later when we're going to update it.
Adding Rectangles
Before we're handling the touch events, let's start with the graphics first.
Once the activity is started, we're going to add rectangles to our current state. They will appear and after that they're going to slowly fade away. For that task, we write a method that will create our rectangle:
1 2 3 4 5 6 7 8 9 10 11 12 13 14 15 16 17 18 19 20 21 22 23 24 25 26 27 28 29 30 31 32 33 34 35 36 37 38 39 40 41 42 43 44 45 46 47 48 | public AbstractSprite createRectangle(int color) { RectangleSprite sprite = new RectangleSprite(color); // create squares int size = MathUtils.getRandomBetween(20, 100); int posX = MathUtils.getRandomBetween(size, RetroEngine.W - size); int posY = MathUtils.getRandomBetween(size, RetroEngine.H - size); //fade in animation final AlphaValueTransition fadeIn = new AlphaValueTransition(0, 255, 2000); fadeIn.setListener(new IAnimationSuiteListener() { @Override public void onAnimationStart(AnimationSuite animationSuite) { } @Override public void onAnimationRepeat(AnimationSuite animationSuite) { } @Override public void onAnimationEnd(AnimationSuite animationSuite) { // start the fade out animation animationSuite.getAnimatedSprite().beginAnimation(1); } }); // fade out animation final AlphaValueTransition fadeOut = new AlphaValueTransition(255, 0, 1000); fadeOut.setListener(new IAnimationSuiteListener() { @Override public void onAnimationStart(AnimationSuite animationSuite) { } @Override public void onAnimationRepeat(AnimationSuite animationSuite) { } @Override public void onAnimationEnd(AnimationSuite animationSuite) { animationSuite.getAnimatedSprite().setActive(false); } }); // add animations sprite.addAnimations(fadeIn, fadeOut); // create the sprite return sprite.init(new PointF(posX, posY), size, size); } |
Actually we're creating squares by applying the same value for the width and height of the rectangle.
The size and position are randomly generated. We use the MathUtils class of RetroGraphicsEngine.
The square will be place inside the area of the drawing surface
of the DrawView component. Next, two separate animations are implemented. The first one serves the purpose
to fade the rectangle in and the second one, fades the rectangle out. This is accomplished by manipulating the
alpha value of the sprite.
The second animation should be started, when the first one ends. For that, we implemented a listener of type IAnimationSuiteListener to
react on the end of the animation. For the fade out animation the listener will deactivate the sprite after the animation ends.
Adding the Rectangles to the State
Every two seconds a rectangle is added to the scene in our RectangleGameState:
1 2 3 4 5 6 7 8 9 10 11 12 13 14 15 | private long timeNow = 0; private String[] COLORS = new String[] {"red", "blue"}; @Override public void updateLogic() { long tc = RetroEngine.getTickCount(); if(tc > timeNow + 2000) { timeNow = tc; int col = MathUtils.getRandomBetween(0, 1); AbstractSprite rect = createRectangle(Color.parseColor(COLORS[col])); addSprite(rect); rect.beginAnimation(0); } updateSprites(); } |
The color value is a color int value. The RGB values ranging from 0 to 255 for each of the components. But we can also specify the name of the color here. It will be either "red" or "blue".
To add the sprite we're using the State#addSprite() method which is provided by the parent class.
It will automatically add this sprite to the root node in our state. Then, we start the first
animation that was added. In this case it's the fade in animation. If we would use
rect.beginAnimation(); all added animation so far would be
executed simultaneously. So we specify the index to start only the first one.
The last statement State#updateSprites() calls the update
method of each sprite in the state.
Finally, we have to update the render method, so that the added sprites
get actually drawn:
1 2 3 4 | @Override public void render(Canvas canvas, Paint paint, long currentTime) { drawSprites(canvas, currentTime); } |
Intercept Touch Event
In order to get the touch responses we have to override the State#onTouchEvent(View, MotionEvent) method
in our state class.
Implementation Logic in onTouchEvent()
Don't do anything related to graphics in this method itself. Those events are captured
and processed in another thread by Android and the RenderThread has no access to it.
For instance, if you want to add sprites to the root node of a state, then just save the information
about what happend and evaluate it in the State#updateLogic() method.
The goal is now to detect if the user touches a red rectangle. The first step is
to determine the touch position. The updated onTouchEvent method in RectangleGameState:
1 2 3 4 5 6 7 8 9 | float x = 0; float y = 0; @Override public boolean onTouchEvent(View v, MotionEvent event) { x = event.getX(); y = event.getY(); return false; } |
That's all. We've overridden the onTouchEvent() to listen for touch events.
We don't want any more implementation logic here. We just store
the coordinates into the member variables x and y.
To actually do the check, we make use of
the helper class ColorTools in the package net.offbeatpioneer.retroengine.core.util
of RetroGraphicEngine. It provides the useful method ColorTools#closeMatch(int, int, int).
We have to update our updateLogic() method in RectangleGameState:
1 2 3 4 5 6 7 8 9 10 11 12 13 14 15 16 17 18 19 20 21 22 | public void updateLogic() { // ... code omitted for (AbstractSprite each : ((SpriteListGroup) getRootGroup()).getChildren()) { if (each.checkColWithPoint(new PointF(x, y))) { if (ColorTools.closeMatch(each.getTexture().getPixel(2, 2), Color.parseColor("red"), 0)) { counter++; // update UI getHandler().post(new Runnable() { @Override public void run() { counterView.setText(String.format(Locale.getDefault(), "Hits: %d", counter)); } }); } } } // our previous method updateSprites(); } |
We iterate through all sprites and do a simple collision check.
If this evaluates to true, we match the colors. For that, we retrieve
the texture of the sprite and get the upper-left pixel and match it
with red. We pass a tolerance parameter as third argument of the method.
This may be very useful in other cases, when colors should be matched approximately.
In this case the rectangles fade in and out but the closeMatch method doesn't
take the alpha value into account. So this isn't a problem here.
Update UI
To update views in the UI we acquire the Androids Handler which is kindly
provided by the parent class. This handler runs in a different thread which is save
to add logic here for updating the UI.
Start the App
Before we can start the app, we have to add our state to the RenderThread.
Open your TouchInteractionActivity.java activity and in the onCreate method
of it insert this as last statement:
1 2 3 4 5 6 7 8 9 10 11 | @Override protected void onCreate(Bundle savedInstanceState) { super.onCreate(savedInstanceState); setContentView(R.layout.activity_touch_interaction); RetroEngine.init(this); drawView = findViewById(R.id.graphics); renderThread = new RenderThread(drawView); renderThread.addState(new RectangleGameState()); } |
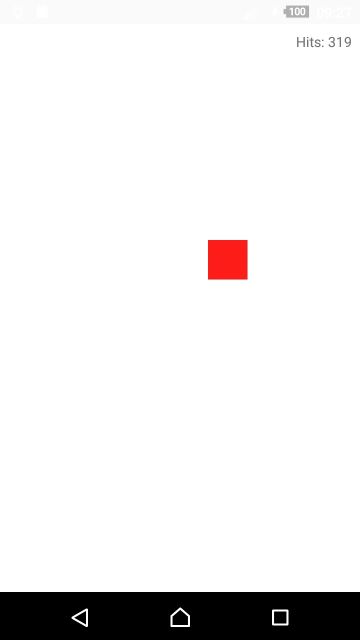
The result should look like this:
Improvements
As you tried the example you probably noticed that you can get more hits when swiping
over the screen. You can extend the RectangleSprite class and add an
additional state if the rectangle was already touched. So we get the hits
only once for every rectangle.