Getting Started 
Installation
There are two ways on how you can include the framework into your project. Either by declaring the dependency in your project's build.gradle file, or by directly importing the AAR library into your project.
Gradle
1 2 3 4 5 6 7 8 9 10 | repositories {
maven {
url 'https://dl.bintray.com/piobeat/offbeat-pioneer-maven'
}
}
dependencies {
implementation 'net.offbeat-pioneer.android:retroengine:0.9.4'
// implementation 'net.offbeat-pioneer.android:retroengine:0.9.5-beta1'
}
|
Importing the AAR Library
First, download the latest version of the library here:
https://github.com/PioBeat/RetroGraphicsEngine/releases
Description for IntelliJ / Android Studio
- Create a new module in your project and select "Import .JAR/.AAR Package", then select the library
- A
build.gradlefile is automatically created, if not create one and insert:
1 2 | configurations.maybeCreate("default")
artifacts.add("default", file('retroengine-release.aar'))
|
- The AAR library has to be in the module directory otherwise specify a different path
- Add the module dependency to your
build.gradlefile:
1 | compile project(':MODULE_NAME_OF_LIBRARY')
|
"Hello, World!" Example
With this introductory example you will get the basic understanding how the main parts of the engine play together. This section shows step-by-step how you set up an activity to use the RetroGraphicsEngine. In the following we will create a simple "Hello, World!" app, which will render a text sprite with the text "Hello, World!" in the top-left corner of the screen.
The Activity
First, you have to create an activity with a layout file. We'll call it HelloWorldActivity.java.
To get things running with the minimal configuration possible, put this code in the Activity#onCreate(Bundle) method:
1 2 3 4 5 6 7 8 9 10 11 | public class HelloWorldActivity extends Activity { @Override protected void onCreate(Bundle savedInstanceState) { super.onCreate(savedInstanceState); setContentView(R.layout.activity_hello_world); DrawView drawView = (DrawView) findViewById(R.id.graphics); RenderThread renderThread = new RenderThread(drawView); } } |
The engine has to be initialised first. RetroEngine is a core class and shares various
parameters for the render cycle and the drawing surface. Most framework classes will access
its values. After that, we acquire the DrawView component in our layout.
The RenderThread (a Thread class) is started automatically as a thread
and concurrently handles all update and render cycles.
For this reason the class will get the DrawView component (which has a drawing surface), to
manage all things like, what sprites are drawn and when sprites have to be drawn.
All in all that approach allows a seamless interaction with your app and makes it non-blocking.
Tip
Read the section Engine Initialization to get more information on how to initialize the engine in different ways.
The Layout
Second, create a layout file named activity_hello_world.xml in the src/main/res/layout/ directory, open the layout file, and place the DrawView component into it:
1 2 3 4 5 6 7 8 9 10 11 12 13 14 15 16 | <?xml version="1.0" encoding="utf-8"?> <!-- activity_hello_world.xml --> <FrameLayout xmlns:android="http://schemas.android.com/apk/res/android" android:id="@+id/activity_hello_world" android:layout_width="match_parent" android:layout_height="match_parent"> <!-- Our DrawView component --> <net.offbeatpioneer.retroengine.view.DrawView android:id="@+id/graphics" android:layout_width="match_parent" android:layout_height="match_parent" android:screenOrientation="landscape" android:theme="@android:style/Theme.NoTitleBar.Fullscreen" /> </FrameLayout> |
Run the example
- Set the activity
HelloWorldActivityas launcher activity - Start the app
- Exception is thrown with the message No state defined
The exception is thrown, because we need to create a State class first. Read the next section to find out on how to create your first state.
Create your first State
States are a base concept of this engine for rendering sprites. Simply said, a state defines a graphical scene. There you can define and arrange sprites, implement logic and interaction between them.
The following steps are involved to create a State class:
- Create a new Java class and let it extend from
net.offbeatpioneer.retroengine.core.states.State - Implement all those methods of the abstract class
State:init()is called only once when the State is started the first timerender()is called withinRenderThread(for more information see RenderThread section)updateLogic()is called withinRenderThread(for more information see RenderThread section)cleanUp()for freeing all used sprites of a state after it is finished or switchedonKeyEvent(), andonTouchEvent()for key and touch events
The "Hello-World-State"
For our Hello-World example we create the following basic state class:
1 2 3 4 5 6 7 8 9 10 11 12 13 14 15 16 17 18 19 20 21 22 23 24 25 26 27 28 29 30 31 32 33 34 35 36 37 38 39 40 41 42 | import android.graphics.Canvas; import android.graphics.Color; import android.graphics.Paint; import android.view.KeyEvent; import android.view.MotionEvent; import android.view.View; import net.offbeatpioneer.retroengine.core.states.State; public class HelloState extends State { @Override public void init() { } @Override public void updateLogic() { updateSprites(); } @Override public void render(Canvas canvas, Paint paint, long currentTime) { canvas.drawColor(Color.WHITE); drawSprites(canvas, currentTime); } @Override public boolean onKeyEvent(View v, int keyCode, KeyEvent keyEvent) { return false; } @Override public void cleanUp() { clearSprites(); } @Override public boolean onTouchEvent(View v, MotionEvent event) { return false; } } |
The code shows the minimum requirements to get things working.
Now you can use all base methods from the State class to add/remove sprites, and call their
update methods, for example. In a moment we will add a simple text sprite.
Hint
You don't have to use the provided methods of State but it's convenient to do so, because they already take a lot
of the work out of your hands. In fact you can create your own sprite lists and call your own sprite management logic
in the appropriate methods (init(), render(), and updateLogic()).
Add your first State
Our current app has only one activity that handles the graphic output of the DrawView component in the layout.
Extend the existing code in the onCreate() method of our HelloWorldActivity with this:
1 2 3 4 5 6 7 8 9 | // what we had so far RetroEngine.init(this); DrawView drawView = (DrawView) findViewById(R.id.graphics); RenderThread renderThread = new RenderThread(drawView); // this is new HelloState state = new HelloState(); renderThread.addState(state); renderThread.setCurrentState(HelloState.class); |
The previously defined state HelloState is added to the RenderThread instance. What
happens internally now: It will transfer all states to the StateManager.
At the end the DrawView component gets to know the actual RenderThread by setting it through the appropriate
setter setRenderThread().
You can also add multiple states to the RenderThread with the RenderThread#addStates() method.
The last line is not necessary, because we only added one state here. If you add more
states you can set the first active one with the method RenderThread#setCurrentState(). Otherwise
the first added state is used or the state where the member variable State#active is set to true.
Notice
In fact, each activity can have its own RenderThread and a DrawView component.
Then you can define the above code in each of those activities. Though not recommended, this approach is possible.
However, it's better to use only one activity that handles all the rendering stuff. You don't want to have multiple threads running in your app.
Of course this depends on what do you want to achieve.
Instead, you should create multiple state classes to define the output and logic for different outcomes of your graphical scenes. Look into the section How to Handle more than one State to get a feeling for it.
Run the example
If you start your app you should see a white screen in fullscreen mode. No exception is thrown anymore because we added our first state.
Create a Text Sprite
Now for the interesting part. We want to render our text. To do that we are creating a text sprite.
In the init() method of your HelloState class we now have:
1 2 3 4 5 6 | @Override public void init() { TextElement textSprite = new TextElement("Hello, World!"); textSprite.init(new PointF(0, 0)); addSprite(textSprite); } |
The two new import statements are:
1 2 | import android.graphics.PointF; import net.offbeatpioneer.retroengine.core.sprites.decorator.TextElement; |
TextElement is a class for creating text sprites. Check this section to get more information on
how to use this specific sprite class (changing the font size, decorating sprites with text, ...).
The next important thing was to add the sprite with State#addSprite() to the root node
of the state. The class can now render the text element when we are calling
the State#drawSprites() method in the State#render() method of the state.
Run the app
You will see something like this if you carefully followed all the steps along here:
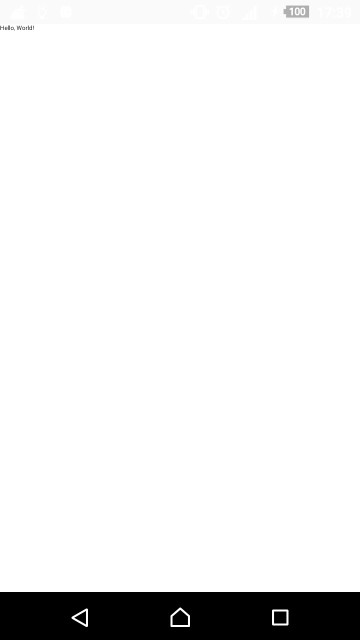
A tiny text saying Hello, World! will be printed in the top-left corner of the screen.