Android Studio Basics
All tutorials use Android Studio as IDE. However, you can still follow all tutorials using a different IDE.
If you're not familiar with Android Studio, this section will cover the basics to accomplish common tasks within Android Studio. Otherwise you can safely skip this part and jump right into the tutorials.
Creating a New Activity
Once Android Studio started, right click on a package in the project overview, and select New -> Activity -> Empty Activity. The following dialog will open:
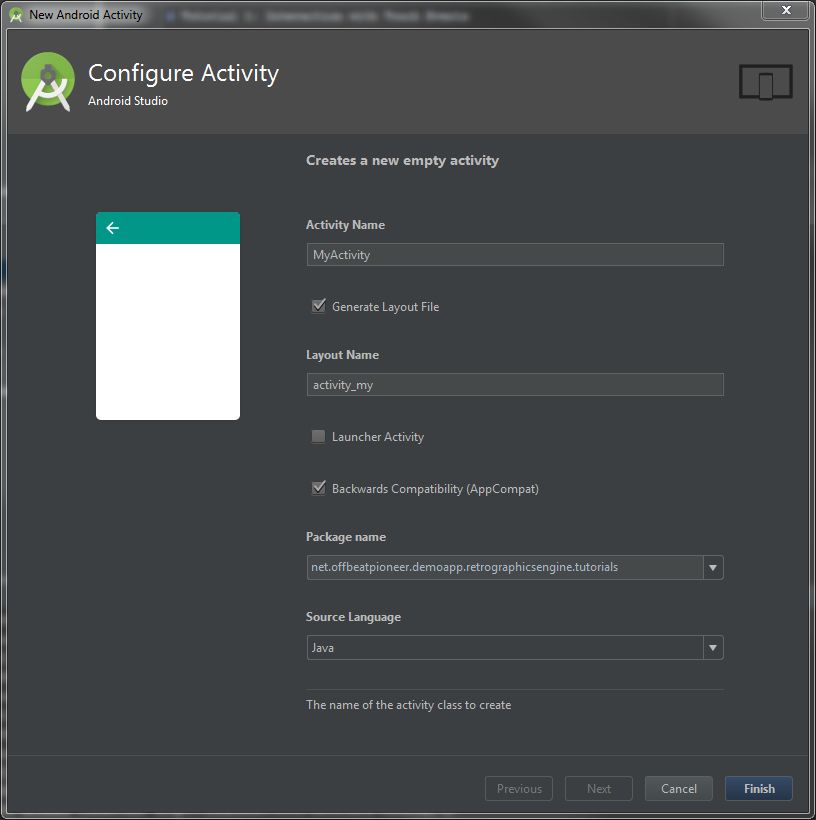
Here you can specify the name of the activity, and let Android Studio automatically generate a layout file. In most cases we need a layout file, so be sure that this option is checked. Apart from that, keep the options like in the image above when creating an empty activity.
We selected Empty Activity, because we only need the minimal requirements to get an activity running.
Adding the DrawView Component
To enable the engine to draw on something, the following view has to be added to the layout file:
1 2 3 4 5 6 | <net.offbeatpioneer.retroengine.view.DrawView android:id="@+id/graphics" android:layout_width="match_parent" android:layout_height="match_parent" android:screenOrientation="landscape" android:theme="@android:style/Theme.NoTitleBar.Fullscreen" /> |
Place this view always as first child in the top most parent of the view hierarchy to
enable the fullscreen mode. The DrawView will then occupy the whole layout.
This also depends on which parent layout you use. Inside a FrameLayout
the DrawView should be the first component so that every other is overlayed on
top of the DrawView.